Showing posts with label Nails. Show all posts

Friday, 15 January 2010

Inglot Nail Polishes

Inglot is a weird brand- noone seems to know about it and I don't think I've ever seen it in any magazines. It's a store I first went to in Canada, and since then I've visited one in the Westfield Center, but even it's website doesn't work. Weird.
But! I really like their stuff! It comes in a literal rainbow of colours at slightly above Boot's prices. And generally seems like good quality. I've tried their eyeshadows and nailpolishes so far and both seem highly pigmented and theyhave a massive range of colours.

Sadly, their colours don't have names, just numbers.

721, matte yellow


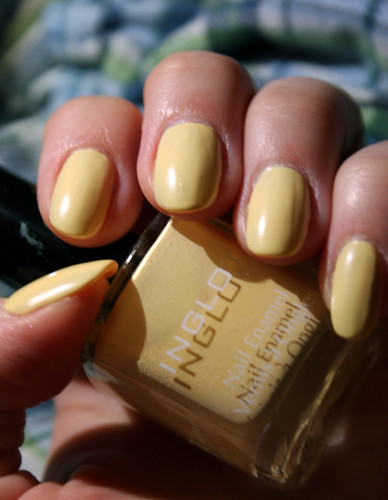
I didn't actually mean to buy a matte colour, and it's kind of annoying. I think it intimidates me or something and makes me not do it evenly. It dries matte instead of shiny, so you can't paint a drythrough top coat over it to dry it quicker, leaving even more opportunity to mess it up, which all means I've alas never worn this out of the house (unless as part of my pastel-fingers look!!.... shh). As for the colour, it's really opaque but not thick, so it goes on well. I think two coats is optimal... I'm not sure custard yellow is really very flattering on it's own though.

 Number 302, Sheer pale pink with green shimmer.


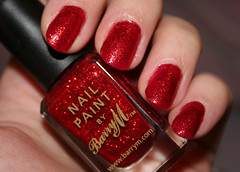
I really love this colour! It's quite sheer so you need two or three coats if you wear it on it's own, but it looks great over other colours to give an unusual green two tone effect. It's quite subtle with a slight unusualness in the green shimmer.


Number 319, Green Gold
 

This is a beautiful green colour with gold shimmer. It paints on fairly opaque but I usually do two coats to make sure it's even. For a polish with such alot of shimmer, it paints on very evenly and always looks nice :)

Number 338, Opaque pale pink
 

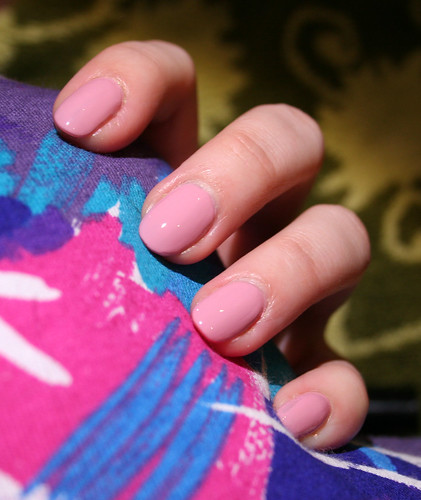
This is a fairly boring colour, but makes a nice change from shimmery pinks for a muted look that's subtle. The pink is not bright at all, almost a blushy skin colour. I don't really know why I bought this but I have used it quite alot for when I don't know what colour I should paint my fake nails but have to paint them something to cover up their fakeness!

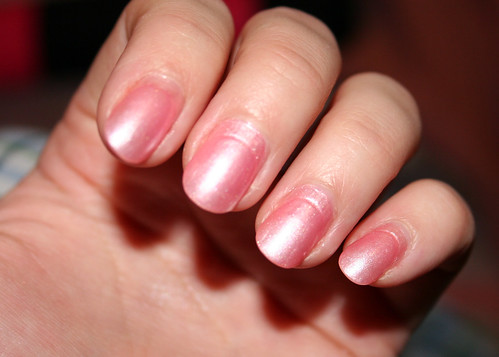
Number 842, Flesh colour :/
 

This is such a gross colour!! It's basically exactly skin colour, so it makes your nails look like your skin has covered your nails or something. The reason I have it is that last summer, my boyfriend dropped something on his big toe, and got a gross black bruise under his nail. He asked me to cover it up if I could so I went specifically to Inglot knowing that if they didn't have the right shade in their huge spectrum of colours, noone would. I found it and it worked perfectly! Just a tiny dab over the bruise and it was disguised. Such glamour!
However, since then I have never used it because who wants fleshnails!?

I have a glittery polish from Inglot that I couldn't find when taking these photos, so maybe I'll do a special post just about glitters one day?


Thursday, 7 January 2010

How to disguise non-infilled acrylic nails.


I enjoy having super strong fake acrylic nails. I don't have them all the time, I usually only get them done for special occasions (which costs around £20-£30) and then upkeep them for a little while until I get bored of them, or they fall off.

As they grow out, the acrylic on the nail moves along the nail where it's glued on to the real nail, leaving a kind of ridge. After a few weeks of neglect, they really start to show up, especially if you have any kind of pearlescent or shiny nail polish on.

The reason I'm saying all this is as a prelude to my mega top tip of the day... how to disguise non-infilled acrylic nails.

The secret is... Use a glittery nail varnish! The specks of glitter refract the light in such a way as to fool the eye into not realising there's an ugly ridge there... the larger the glitter specks, the better.

So here are my nails after about two or three (or more? Not sure :/) weeks of not being infilled. Pretty noticeable gap there...


(this polish is Sally Hansen Maximum Growth in 'Profound Pink' (which looks lovely on nicer nails))

So I cleaned all that off, and painted them with one coat of MAC's Gee Whiz:


Then I put a coat of Barry M Red Glitter over that, and a coat of clear dry-through top coat.

Glitter nailpolishes annoyingly tend to need about a million coats of clear on top of them to get a smooth surface, so I would usually do more than just one, but I couldn't be bothered today. One of the reasons I put the 'Gee Whiz' on beforehand was so I only had to do one coat of glitter. The Barry M glitter polishes are super dense and you can get a perfect look just using them on their own, but then you'd have to spend even more time putting on top coat to get smooth nails (boring).


 So there you have it- how to cover up acrylic re-growth nail ridges without paying to get them in-filled.


I hope this was useful to you! This would also work for people who have super ridgey nails that they wanted to cover up perhaps...

Coming another time, a rant about how impossible glitter nail polish is to get off!